The Art of Voice Overs – Part 1
Voice overs are a major aid in learning retention. A learner can absolutely read through an e-learning course but that only engages the eyes. With voice overs you are now engaging the ears and boom!… you have just doubled your retention. The daunting part is the how to’s of recording your voice. Most folks actually hate their own voice. Believe it or not there is some actual science behind that. There is typically nothing wrong with anyone’s voice, it’s really a matter of using that voice in a controlled way for teaching purposes. This series is going to cover that topic and more. Here are the topics we will cover for our main theme: “The Art of Voice Overs”
Part 1- Fundamental Components and Hardware
Part 2- Voice Articulation and Speaking Best Practices
Part 3- Voice Over Script Creation and Best Practices (coming soon)
so let’s start with part 1…..
Part 1- Fundamental Components and Hardware
The cost of purchasing or subscribing to content can be a deal breaker for your budget. For many of Edmego’s clients we have found that their content needs are extremely unique and that subscribing to content for their team would actually devalue the learning experience. Hence the need to move forward with a content creation plan. Let’s cover some key components. You will find that these are extremely cost effective and easy to implement.
Audacity
Audacity is a great recording software tool. We have been using this tool for years to assist us in our voice over program. It helps you with recording your voice overs, conducting simple edits and then exporting them into whatever file format you choose. We recommend either .wav of .mp3 format for your voice overs. Create a sub-folder in your course directory. So your main folder will be the course name. Sub-folders could be: Course content, Research, Images and then Voice Overs. Once you are done recording your voice over, export the file into this directory. It is wise to make your voice overs shorter and I will explain why in part 3 of this series.
Microphones
Either in Amazon or Google use the keyword search “voice over microphone”. You will find many options and features available. For $100.00 or less you can purchase a device that has pretty decent quality and
will provide you with a great tool to make your voice overs. Don’t get sucked into companies who claim they have a built in recording device for their LMS. All computers have built in recording devices. You need to make a choice. Do you want your course to sound like it is being played in the Brooklyn tunnel or in a high class studio? Edmego recommends that you take the extra steps and record your voice overs in a quality environment. If you go easy or go cheap then you can only expect the same kind of return.
Acoustic Isolation Shield
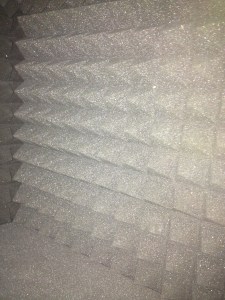
This is an absolute must. There are very simple desktop versions available. This tool performs exactly as it is described. It helps block out unwanted noises and it keeps your voice within the location of the microphone. A professional recording studio wall is covered with this material. This is another cost effective way to to create great quality voice overs.
Location
Location is critical. A basement office is best but not always available. You need to choose a room that is the most isolated or set up a room for voice overs and let your team know that you are “in production”. Go ahead and yell out “Quiet on the set”. It’s fun. You sound like you are in Hollywood. Your team will roll with it. Make sure your blinds are shut if you have windows. Turn off any unnecessary equipment. Some microphones can even pick up the fan on a computer. Think production. Think quality. Think planning.
So that wraps up Part 1 of The Art of Voice Overs. If you have any tips or comments please feel free to share in the comment section below. Below is a short video on how the Edmego course builder can really help streamline your content creation process. Reach out to us if you have any questions.
Written by Jonathan Saar
Would you like to learn more about Edmego?


